
I do not have a lot of experience with wiring or making various things light up. This costume is one of my first adventures into light-up features on a costume, and this was a very simple start. For a tutorial on the light-up headphones go here.
This tutorial will be fairly short, because my sleeves were actually very easy (but expensive!). I have found various websites that really help explain EL sheeting and how to use it, so through-out this tutorial I will be linking to those sites to help me explain. I'm sorry, but I don't have a lot of "in-progress photos" since I bought the EL sheet at the size I needed and just slipped it into the sleeve (more on that below!)
The sleeve base:
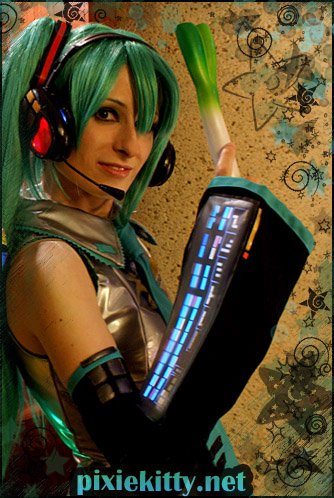
I made each sleeve from fabric as normal. They slide up on my arms and stay up pretty well, but I suggest adding some elastic to the tops to keep them up on your arms better!
A rectangle of clear vinyl is sewn on the front of each sleeve - but the top is left unstitched so that it makes a pocket to hold the "computer panel" image and EL sheet (which goes under the printed image to illuminate it). Each sleeve has a button hole under the vinyl pocket to thread the wires from the EL sheet through.
The light-up part:
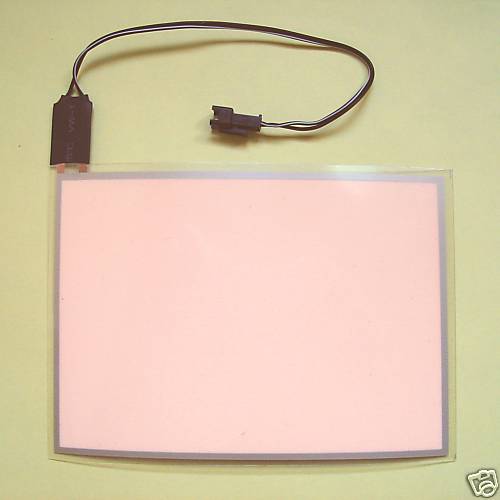
This part was the easiest, but most expensive part. I spent close to $60.00 on the EL sheets alone! In the end, I didn't think it was really worth the money for me since I don't wear my costumes after dark very often. However, if you plan to wear your costume at night or in the evening, then this is a pretty cool effect! Do note that many cameras do not pick up the lighting though.
I used Electroluminescent Sheets (EL sheets) aka EL backlight sheets to make these light up. The light-up panel slides into the clear vinyl pocket. The wires that power the sheets are each attached to a 9 volt battery pack (that is rather bulky and annoying to wear). I made black cases that close with Velcro to hold the battery packs (they look like little change purses). Each of the two cases have a Velcro strap to attach them to my arms!
Important: Before ordering your EL sheets, make sure you have a battery driver with it! The 9 volt battery driver that I used has an on/off/flash switch.
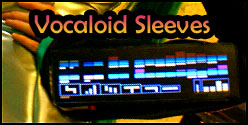
The "Computer Panel" image:
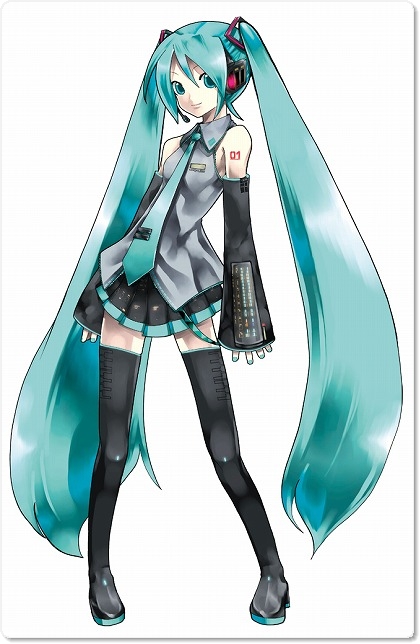
This is where I spent most of my time. I made this image in Adobe Photoshop myself. It is based from this reference image:
Once I was finished designing the image, I test printed it on normal printer paper several times to figure out the size that I needed to print it for it to fit into the clear vinyl pockets that I sewed onto the sleeves. When that was all figured out, I printed it onto a special plastic made to go through printers called "backlight film". I can't seem to find the exact website that I purchased this stuff from, but I have read that it can be found at various office supply stores. Here is a great example of what it looks like when you put the backlight film with your printed image over an EL sheet.
NOTE: Please do not ask me to send you the image I used for my sleeves- I put a lot of time into it, so I don't want to just hand it out to everyone. I will not send it to you. It's up to you to be creative and make your own designs! Just have fun with it, and make it your own thing- you will be a lot more proud of your creation if it is your own! :)
Helpful Resources:
El Inc. - Information on what EL sheeting is, how to use it, and specifications. You can also purchase EL sheets and supplies from this site. |